Recently, my car died a [horrible death] on the highway. I posted a couple of pictures a little while ago, but to recap:
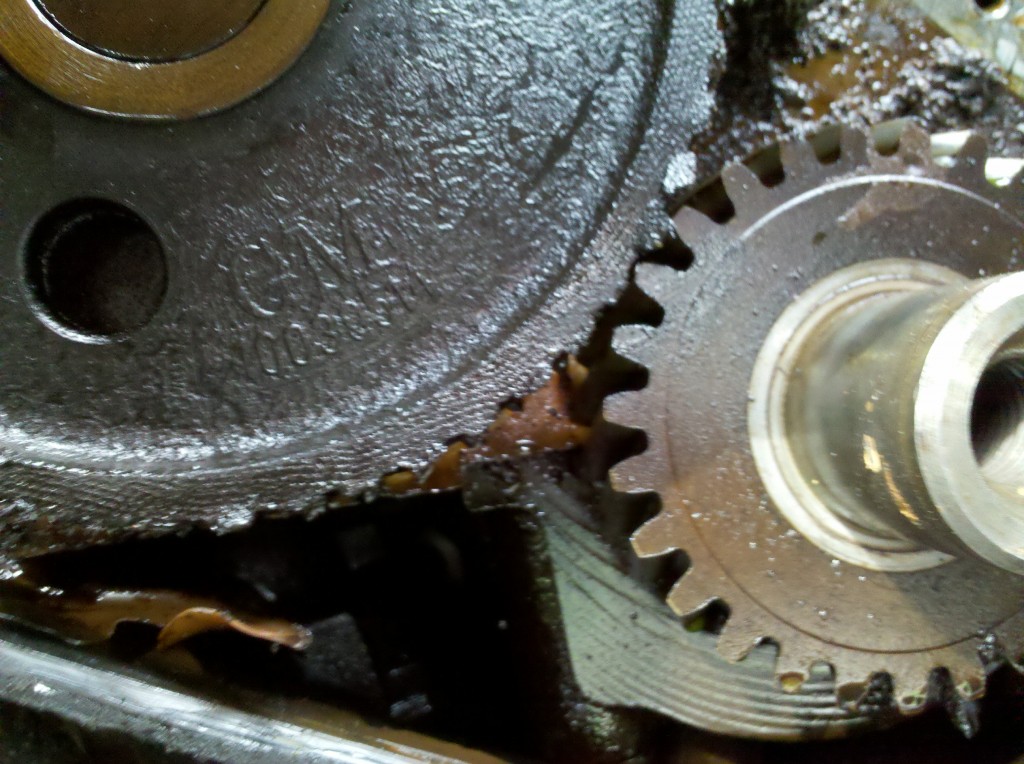
After a couple of hours of research, I found out a few things about my 1987 Oldsmobile Cutlass Ciera. For one, it has the tech-4 engine (sometimes incorrectly called the 4-tech). This is a later throttle-body injected version of the classic 1970’s GM Iron Duke Engine. 2.5 liters of displacement over 4 cylinders. The timing is set up in such a way that the cam and crank gears synchromesh together directly and are designed to be as simple as possible. Unfortunately, the gear that is likely to fail is on the camshaft, as it is a fiber-nylon mesh. This gear is hydraulically pressed on to the camshaft, making replacement difficult. However, it is not impossible – my Iron Duke is now running better than ever. Without further ado, I present the Iron Duke timing set in-car replacement!
Step 1 – Accessing the Timing Set.
1 ) Drain engine coolant. Some guides say to drain the oil and drop the oil pan – I found this step to be unnecessary as long as you let the oil drain to the bottom of the engine for a little while.
2 ) Remove the radiator overflow reservoir to clear some room to work. Your biggest enemy will be the lack of space between the engine and the chassis.
3 ) Remove the serpentine belt. The tensioner is on the engine block itself and is spring loaded – just push it back with a prybar to release.
4 ) Remove the crankshaft bolt and crankshaft pulley. The bolt isn’t that difficult to break free, but this step will probably require a friend’s help.
5 ) Remove the power steering pump. There are 3 bolts you need to take off. You will begin to hate this job when you realize one of the bolts is on the bottom of the pump. You must rotate the pump’s pulley and use the access holes provided to get to the 3 bolts. I tried using a universal joint and a 1-foot extension on my 3/8ths ratchet to get the bottom bolt, the u-joint just broke. I found the best method to be a 1/4″ ratchet with a long socket, plus a little persuasion from Mr. Hammer. You do not need to disconnect all the lines to the pump or drain the system, just lay it aside once it is free.
6 ) Remove the tensioner assembly. There are, again, 3 bolts holding this onto the engine. When you remove this assembly, a hole in the engine block will appear, so I seriously hope you followed step #1.
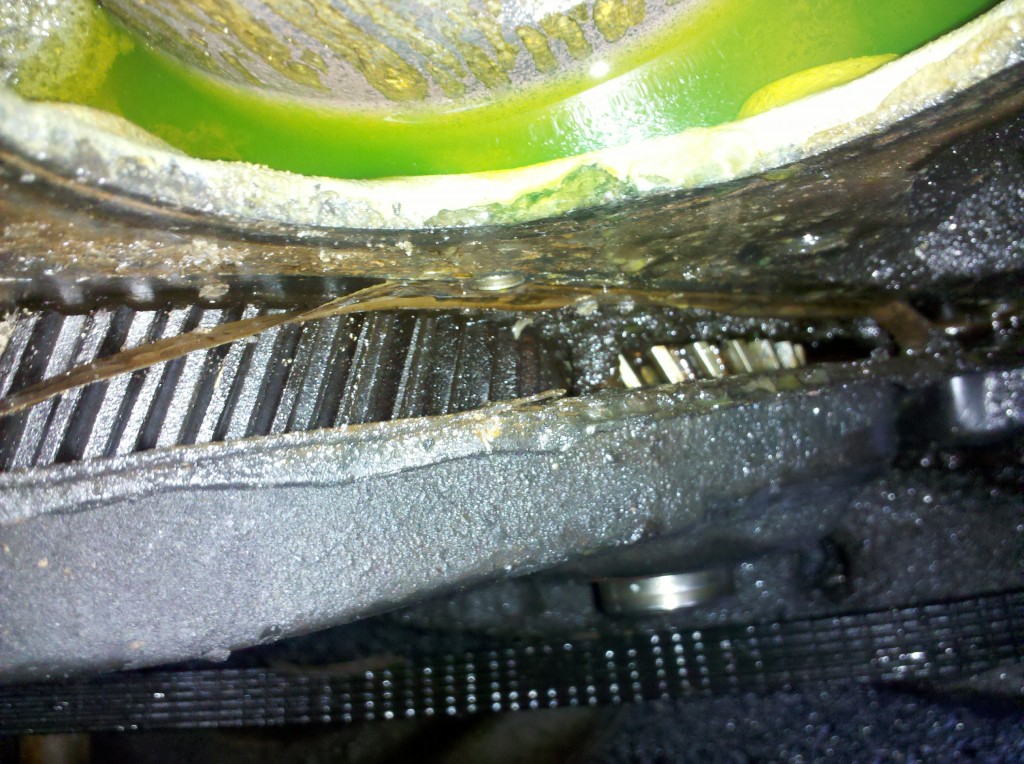
7 ) Remove the timing cover. There are 8 bolts in total that need to be removed. Then, using a razor blade or some such, slice the gasket between the timing cover and the oil pan. The timing cover will now come off easily by hand.
Step 2 – Replacing the gear.
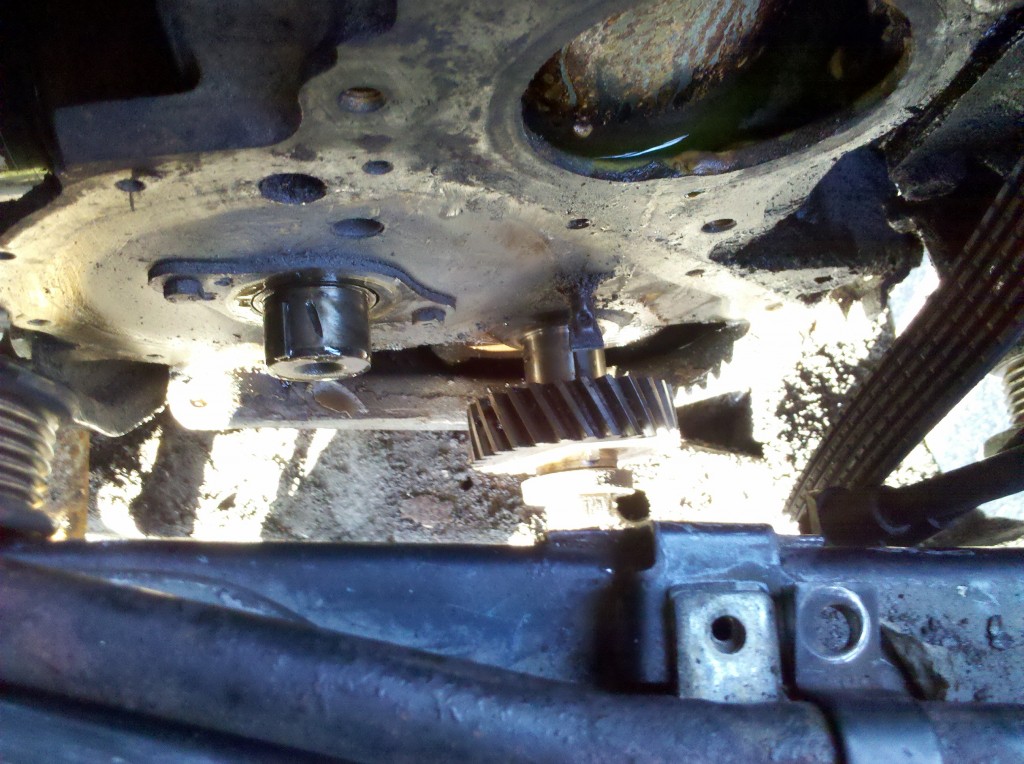
8 ) Get a new timing gear (or two). I’m assuming you’ve now seen something similar to the picture above under your timing cover. [A new fiber gear runs about $30 on RockAuto.com.] I’ve heard of some people using all-metal gears, but I have my reservations about that. The fiber gear lasts well over 100,000 miles – a longer timing maintenance interval than most cars on the road today. Using pure metal will undoubtedly be louder, and may put the engine at risk when it fails. Shards of metal tend to be much less forgiving than shards of fibrous nylon. All proper documentation will tell you to replace the crankshaft timing gear while you’re in there. I don’t see why not, the crank gear comes on and off by hand. But, the engine is designed so that the fiber gear takes all of the abuse, so if you wanted to save some money and only replace the camshaft gear, you wouldn’t be the first person to get away with doing so.
9 ) Now comes the hard part, removing the old camshaft gear. Traditional service manuals will tell you to either pull the engine, or drop it in its cradle. I’m assuming you can’t or don’t want to do this – it’s ok, I didn’t want to, either. To evade a gigantic pulling process that requires special tools, drilling/tapping holes, and all-around suckiness, break the fiber off of the metal piece in the middle of the gear (the gear hub). Be extremely careful not to break the camshaft cover behind the gear – it is very fragile. Also be sure not to tap on the camshaft in any way. Doing so will lead to oil leaks at the rear-end of the engine. Then, using a dremel tool and a diamond bit, carve a hole in the middle of the hub. This process took me about 3 hours.
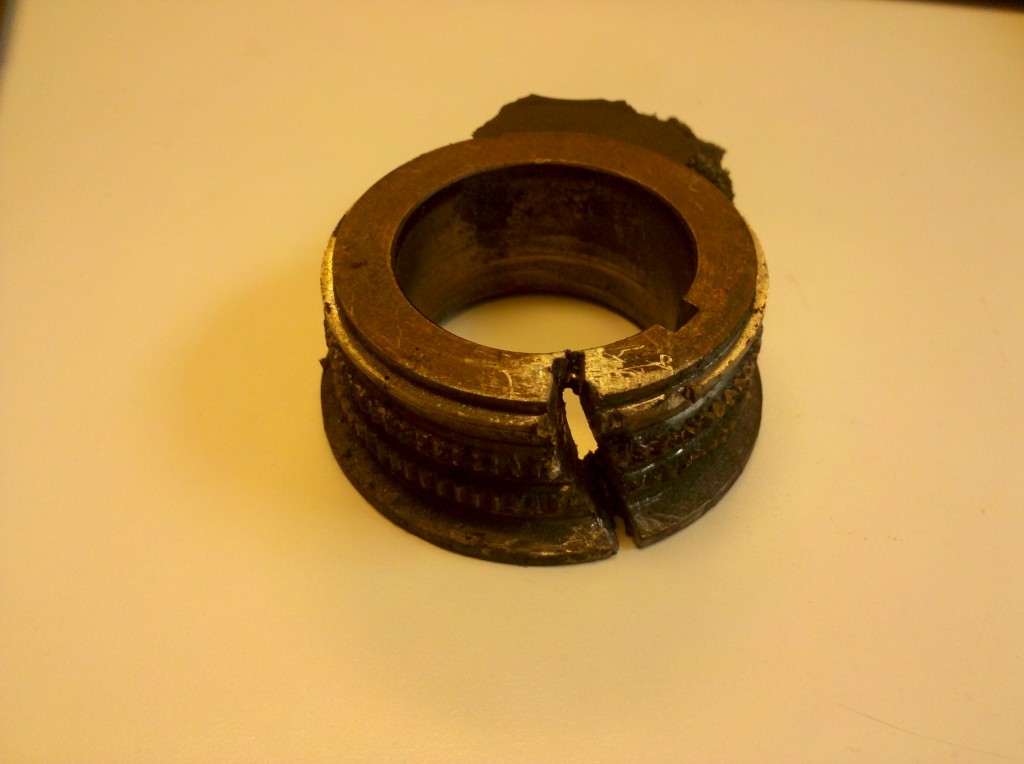
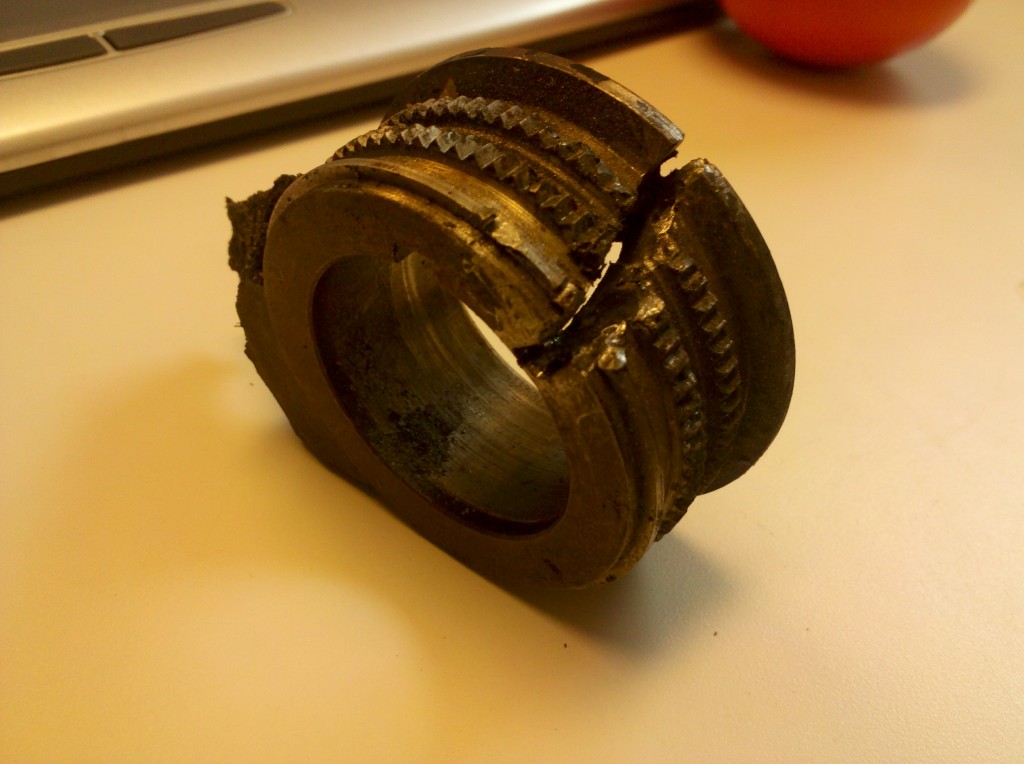
10 ) Clean up the mess you made. If you scored the camshaft while using the dremel, no big deal, just polish it up and remove any metal burrs that you may have created. The camshaft needs to be as smooth as possible to accept the new press-fit gear. Give the camshaft a good coat of oil as well to prevent rust under the gear. You will see that there is not a lot of room available:
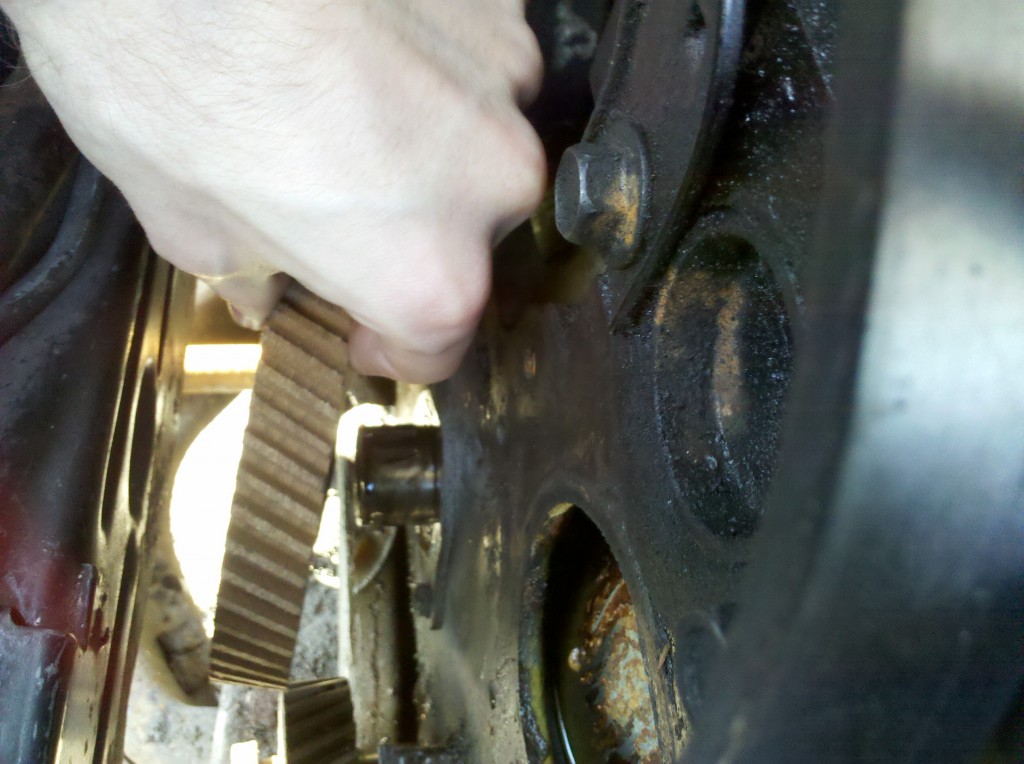
11 ) Now the really hard part – getting the new gear on. The most back-asswards way of doing this is to torch up the hub on the new gear to expand it, then quickly slide it onto the camshaft. It’s a great idea in theory, but can easily damage the fibrous gear. I decided to go this route anyway for lack of a suitable timely alternative. It worked about 3/4ths of the way for me, then the hub cooled too much and I was stuck with a camshaft gear that wasn’t totally on the camshaft. I attempted to torch the hub for 5 minutes with a blue flame. If I was going to do this job again, I would torch the hub for 10 minutes and be much quicker about getting it onto the camshaft. Luckily, [my brother] happened to own a [10-ton Porta-Power], which has a [2″ press attachment.] After my error, I had about 2.25″ of clearance. Phew! If you’re going to use the porta-power (which you may be able to rent), be sure to brace the backside of the engine, otherwise the porta-power will just push the whole thing over. I had fantastic results with this – the gear literally slammed into place with very little effort.
12 ) Timing. This is important. There is a dot in one of the troughs on the camshaft gear, and a dot on one of the teeth of the crankshaft gear. Make the two dots touch and you’re all set! Easy peasy.
Step 3 – Reassembly and other tune-ups.
13 ) Put the timing cover back on, be sure to use a healthy amount of RTV along the mating surfaces between the timing cover and the oil pan. Leaks here would be bad, mmmk?
14 ) The rest of the assembly process is the reverse of step 1. Putting the 3rd bolt back into the power steering pump is way easier than taking it out. Start it by hand, then use a universal joint and a long extension. It works going back in because you can rest the joint against the suspension column, as opposed to just slipping off when attempting to remove the bolt.
15 ) There are a number of additional tune-ups you should perform while your engine is disassembled. I replaced the coolant, oil, oil filter, air filter, MAP sensor, EGR valve, serpentine belt, crankshaft oil seal, spark plugs, spark plug wires, and I added a cleaning agent to my crank case and fuel tank. I used a product called SeaFoam – works really well and can be added to pretty much anything.
At this point, your Iron Duke is ready for another 100k+ miles. This whole process took me about a week to complete, but if I had to do it a second time, I think I could accomplish the deed in two days. Just make sure to have all the tools you need ahead of time!


